Wednesday, October 28, 2020

Memory Rag Quilt #2


 I finished the second rag quilt! My arm is none too happy with me, so I'll be working on lighter weight projects for a few days, to give my arm a chance to rest. I'm not even going to start the baby quilt I need for next weekend until this weekend, since there will be so much cutting involved. Those rag quilts were heavy, and my arm deserves a rest. When I could hardly get my shirt off at night, because I couldn't raise my arm, I knew I'd overdone it! I'm hoping the weight of the rag quilts feel like a warm hug from their mom, so even with the process being hard on me, it is hopefully worth it.

I'll go back to piecing on the quillows for a bit. Even the stripsets aren't that hard on my arm. 

Am I the only one who feels like the holiday season is happening way too soon? 2020 may have been an eventful year in some ways, but it still seems like it's flown by. I think we've mostly figured out a pared down Thanksgiving plan, but I'm stuck on how to handle Christmas. It's really hard to think about it, since I am so late on making Christmas gifts and shopping. I still have other non holiday things that need to be finished as well, so even now I'm not in full out Christmas production. The quillows are for Christmas, but aside from that...We'll just have to see what I can get done. At least I got my newest grandbaby's name ornament finished so when the Christmas tree goes up, it's ready to go on! Hey, no matter how small the project, I'm counting it as a win!


Friday, October 23, 2020

Memory Rag Quilt #1

I finished the rag quilt for my nephew made from flannel and my late sister's clothes.


My sister had two favorite colors, red and purple. My nephew thinks of red when he thinks of his mom, and my niece thinks of purple. I'm making them both rag quilts from her clothes, but when I was buying the flannel to go with her clothes, I opted to use colors they associate with their mom. The red was showing through the light colored shirts, so I made the middle layer white flannel on my nephew's quilt. I working on my niece's quilt now, and I used two shades of purple flannel for hers. I didn't divide the shirt pieces evenly. They both have at least one square of each printed top my sister had, but the extra squares and solids were divided differently. I added more solid purple to my nephew's quilt to work that into his, and I added the solid red to my niece's quilt, so they both have a good combination of her favorite colors.

I like how the quilt looks finished, but I admit I did NOT enjoy sewing the squares together with the fringe already cut. I won't be using the rag die again, and although I'm sure there are more rag quilts in my future, I'll be clipping the seams with scissors afterwards. My niece's quilt is already cut with the rag die, so I have to deal with it for one more quilt. Hopefully I learned enough on the first one to have less problems with hers.


I did more tweaking on what is being stored on my new cutting table. All the containers with the purple handles were in my sewing room closet, and they fit OK ( not perfectly) in the cubes. I am glad that worked out, because I've been wanting to move a big set of shelves I had in the sewing room closet out, and now I did!


Now I can hang things the whole length of the closet, so besides my quilt tops, I chose to hang all the wide backings I have. Most of the wide backings I have are for specific quilts that aren't finished yet. I do have a couple that I bought for a specific quilt, then ended up using something different. There are actually a couple inches between each hanging item, so there isn't as much hanging as it looks like. The packaged batting in the back is all king sized, anything smaller I use the rolled batting. The rolled fabric is all fleece which I use for weighted blankets, backings, and such. The seven quillows I am making right now will all be backed with fleece, busting a chunk of this. 

I usually use skirt hangers to hang my quilt tops, but for king sized quilt tops the weight of the top is too heavy for those, and the wide quilt backs were too heavy as well. While looking for heavy duty hangers, I stumbled across blanket hangers, which I had never heard of before!


These blanket hangers work great for the heavy tops and wide backings! I'm so glad I came across them, they were just what I needed!

I've got the blocks done for five of the seven quillows I need to make now, and here's how far I've gotten with the green.


All of these 1.5" strips are sewn into pairs, and now I need to press them before I do any more sewing on these. I had a LOT of really short strips, which won't work for the 6" blocks I use in my quillows, but that's OK, because I decided to go in a completely different direction with the next baby quilt. 

I've moved so much stuff in my sewing and fabric rooms, is it any wonder I misplaced the pattern I planned on using for the next baby quilt? The baby shower is November 7th, so I am in a serious time crunch. I bought a really cute backing for the baby quilt, but had planned on using stash for the top, with the pattern I purchased. The theme for the nursery is woodland animals. While I was sewing so many really short strips together, I thought I could use the short strips to make some scrappy trees, which got me thinking in a completely different direction for the baby quilt. Now, instead of using a pattern, I'm going to improvise the whole top, to match the backing I bought. I did buy some coordinating fabric to supplement what I had, so some of the top will be from stash, some just scraps,  some will be new. I still really like the pattern I bought, so I'm sure someday I'll make it (after I find it) but I'm thinking maybe the pattern was supposed to be misplaced, because what I have in mind now seems more "right" for this baby. Hopefully my execution will be half as nice as what I'm picturing in my head. I'm pretty excited about starting it though!

So how am I balancing so many projects? Well, during school hours I'm sewing on the quillow blocks, It's mindless sewing, and easily interrupted so I can check on the grandkids doing distance learning. I do whatever pressing I need to do at night when I'm too tired to sew, but can press while I'm "watching" (more listening) to a movie or TV show.  

I'm assembling the rag quilts mostly on the weekends when the grandkids are elsewhere. I want to get as much of the last rag quilt as I can assembled this weekend, then I'll figure out how to add in working on the baby quilt. Since it will mostly be improvisational piecing, I'll be cutting a lot, so I'd rather work on it in the basement so my new cutting station can be close by. Working in the basement doesn't work during school hours, so I may be working on it upstairs and down, we'll see. 


Friday, October 16, 2020

DIY Cutting Station

It's a reality now, the cutting station I've been tweaking on paper for months now is finished!


We had a few hiccups when making it, but in full disclosure mode, I'll let you know what didn't work for us, as well as what did.


I had a big piece of melamine that I had used on top of the used kitchen cabinets for a cutting island a while back. Instead of being the top this time, the melamine is the bottom. Plywood is what most people use, and a great option, but we wanted to use what we had as much as possible.  I used 5 cube units, 3 six cube units (2 of which I already had), and 2 two cube units. Now, it would have been easier to use 8 cube units on the sides, but Target was out of them, and it looks they might be changing which brand they sell, and the measurements were off from the two six cube units I already had. I really wanted to use at least one of the six cube units I already had to save some money. Since I couldn't get the 8 cube units, I ordered one more six cube, and 2 two cube, so I still have the eight cubes on either side, and the six cubes for the end cap. We arranged the units on top of the piece of melamine, so DH could cut it to the size we needed it to be for this project. I didn't care about the one inch overlap on the end, but the side needed to be cut down. 


Most of the DIY craft tables I see out of cube units don't have this center section. This section is a key part of my plan. 


The bottom is now cut to size, and after watching different YouTube video's for similar tables, we tried assembling it upside down. 


The bottom is now screwed to the cube units, and we opted for six 4" casters. The unit is now 44" X 74" so we didn't think four casters was enough support. The four corner casters have brakes on them, so the cutting table won't move unless I want it to. 

Now to flip the unit over. We had a couple people to help, and there was a communication failure, so instead of grabbing onto the cube units to flip it, they tried to only grab the piece of melamine. Yeah...full disclosure...the bottom came off. The cube units aren't solid wood, and we knew that, but the other people didn't. After that disaster, we were done for yesterday. 

Today was a new day, and a new try for putting this together. To avoid another disaster, DH decided to just assemble it right side up. 

The end cap unit needed to be placed first. Everything else builds off of this. 


He ended up screwing the cube units into the base from the top, but he placed the screws so they wouldn't interfere with the bins sliding in and out. 


Now it was time to add a long shelf in the middle of my U shape. DH used L brackets attached to the cube units uprights to hold up the shelf. The MDF we used as the shelf wasn't as smooth as I wanted, and I didn't want it painted (mostly because I was impatient to have this project done)


I had some clear vinyl in the house, so we wrapped the shelf in that, and stapled it on the back. Voila, smooth shelf!


We had purchased two tabletops from Ikea to use for the top, but they needed to be fastened together. DH used five flat brackets to connect the two tabletops. 


DH screwed the top to the cube units by screwing up though the tops of the cube units. He had to make a THIRD trip to the hardware store to get a different sized screw. All the screws he had were either too long or too short. I definitely didn't want screws coming through the tabletop! The tabletop is now 47" x 78".

My new cutting station has 22 cube areas. 12 of those cube spaces I already had full, since I was already using those units. I had a net storage gain of 10 cube spaces, plus that center section.


I used the bins I already had on the side that faces the hallway. I figured that side should look neat! All of these are either holding quilt kits, or quilt blocks waiting to be assembled into quilts. 


The endcap holds most of my Accuquilt dies. My Studio cutter is just behind where I was standing to take this photo. 


This side is all new storage. I'm trying to move my scrap user system into the containers on the right. These Plano containers are sized so four containers fit in a 13" cube space. I might buy one more set of those, I haven't decided. The two cubes that have fabric in them are fabrics I've pulled for projects, but haven't cut yet. Once I cut those projects, I'll put the fabrics away in stash, so those will be empty again. The one grey bin has all the accessories for my vintage sewing machines. I haven't completely decided how to organize this side, but I do know I am hoping to move some of the stuff from my walk in closet in the sewing room to this unit. 

Since so much on this unit are specific projects, the contents will change pretty frequently as I finish things. I might have DH make me a couple shelves for this side, so I can more easily use smaller bins on this side. 


That long shelf in the middle of the U now holds two rolls of batting. I normally have a roll of polyester batting and a roll of cotton batting at all times, and I've always struggled with where to store them. Now my rolls of batting have a home! 

I am so thankful DH got this together for me! I'm sure I'll be tweaking what I store on it, especially since as I finish projects I'll be emptying bins that are already on here. I'm hoping this is as functional as I think it will be, and it's counter height now, so perfect for cutting without bad ergonomics!


Wednesday, October 14, 2020

Washing Snow

I need to get better at taking before photos! By the time it occurred to me to take a before photo, I had already completely emptied the coat closet.

Cleaning out the coat closet in the living room has been on my to do list for a while. I've tweaked sections of it here and there, but the last big cleanout of that closet was probably five years ago. This time I decided to completely empty the closet, because I wanted to clean out enough stuff to be able to store the 8 ft folding basting tables in this closet. 

No before photos, but here's the after photos.


After talking it over with DH, he opted to store the helmets we use for the grandkids upstairs in his office. There wasn't anything on the top shelf in his office closet, and since he doesn't take the grandkids riding all the time, in the office closet is good enough. We went through all the coats and riding gear, and whittled it down to what he actually uses. I took out all the hangers not strong enough to hold the heaviest coat (he's got an armored leather jacket that weighs a LOT). We had a taller set of plastic drawers in here for his riding gloves, rain suit, etc... but this wider set that shorter holds more and allows for the coats to be hung directly over it. I got him to dispose of his old helmets, yes broken and damaged helmets can get thrown away, thank you! The two bags next to helmet stay, one is a first aid kit he takes riding, and the other holds club patches and stickers he takes on club rides. 

Here's the other side of the closet. After purging so much I easily had enough space for the two 8 ft folding tables, the leaf from the dining table, and I can even fit the vacuum in here and get it out of my pantry! The milk crate on the shelf just hold extra helmet visors, and he's got a couple motorcycle covers up there. I told him he can actually bring the grandkid helmets back downstairs if he wants, since we got rid of so much. 

Going through a closet that hasn't been cleaned out in a long while reveals some odd things. We had a jacket with the tags still on it, that fits NO ONE in the family! It's getting donated, so hopefully someone that it will fit will enjoy a new jacket at a used price. We had some other jackets that also fit no one, and we managed to re-home those to friends already.  

One thing from the closet was just relocated to the storage room, and it's more in my wheelhouse than DH's. It also led to the oddest household chore I did this week. 


When our kids were young, we lived in Missouri where winter snow was a regular thing. There are parts of Arizona that get lots of snow, but not right where we live. To offset the disappointment of not having snow, I invested in plush snowballs a few years ago, and every Christmas I take them out and we have a huge snowball fight. I kept the box with the "snowballs" in the coat closet, but when I took the box out I realized it was barely holding together. When I opened the box, I noticed all the snowballs were covered in sidewalk chalk. So, my oddest chore of the week was washing two batches of snowballs in the washing machine!


They are all white again, and ready for this holiday season. The twins are already working on convincing me to get them out for Thanksgiving! It's not too hard of a sell ;-) The empty tote I stuck them in is bigger than I need, but it's fine for now. The broken cardboard box made its way to the recycle bin. 

I don't feel like I've gotten much done on the sewing front. I do have all the blocks made for five of the quillows I need to make, just two more to make blocks for. I have one of the rag quilts down to the last five seams. Five seams to sew, sew around the edge and I'll have one finished. 

DH is getting his magazine ready to mail as I type, so hopefully, my new cutting station is soon to be a reality!!! I know part of the reason I'm having a hard time staying motivated to sew is because what I want to be doing is organizing my new cutting table.

I did some tweaking of my ironing station today, and moved things around a bit. I decided I didn't like the bias tape rolls there, so those got moved into the plastic drawers I took out of the coat closet. That's fair, since the plastic drawers I moved into the closet came from my fabric room! So the bias tape rolls are still in my sewing room, but in closed storage which I feel better about. For now, I moved some plastic bins I already had onto the ironing station shelves, but the bins aren't fitting on there to my liking, so we'll see what else I have around that could work better. It's still a good temporary solution, because I managed to clean off my thread cabinet, and I work better with uncluttered surfaces. 

It's funny, I can work on several projects at once, and easily keep them all straight, but if I have too much visual clutter, I start losing any desire to work on anything. As soon as I clean it up, I'm good to go again. I'm really a fan on project bins that aren't clear. If I'm looking at a colored bin on a shelf that's visually simple to me, but a clear bin where I can see a bunch of stuff in it is visually cluttered and I don't like it. I love busy scrap quilts, but those are finished. I think it's mainly unfinished things looking busy that overwhelms me. It must remind me I'm not sewing fast enough!


Wednesday, October 7, 2020

New Ironing Station

DH is still working on his scooter magazine on his days off, so my new cutting island isn't happening yet, BUT, I did get the new ironing station finished!


The big board on top DH helped me make years ago, and the cover was gross. I had made two covers originally, and I thought I had already switched to the second one, but I came across it while moving stuff around, so I switched to the new cover now. I moved my quilting magazines (This is after going through them and purging a bunch) to the bottom shelves, along with all of my FMQ and walking foot quilting books to the bottom shelves. I have the shelves away from the wall, so that when I'm pressing yardage it can go behind the shelves as I press. Because I have the shelves about 3" from the wall, I wanted really heavy stuff on the bottom shelf to stabilize the shelves as much as possible, and it seems to be working. 

The middle shelves I'll likely put different containers on, but these were just on top of the cube storage shelves that had been here. It was good enough to put them here for now. I like all my bias tape rolls on the top shelf, but I'm wondering if I should put them in containers to make sure they don't get any starch on them. What do you think? I am a starch fan, and I don't go crazy with it, but overspray can and does happen on occasion. 

Having a permanent ironing station again will make the room less crowded, since I won't have to keep putting up an ironing board in the center of the room when I need one. 

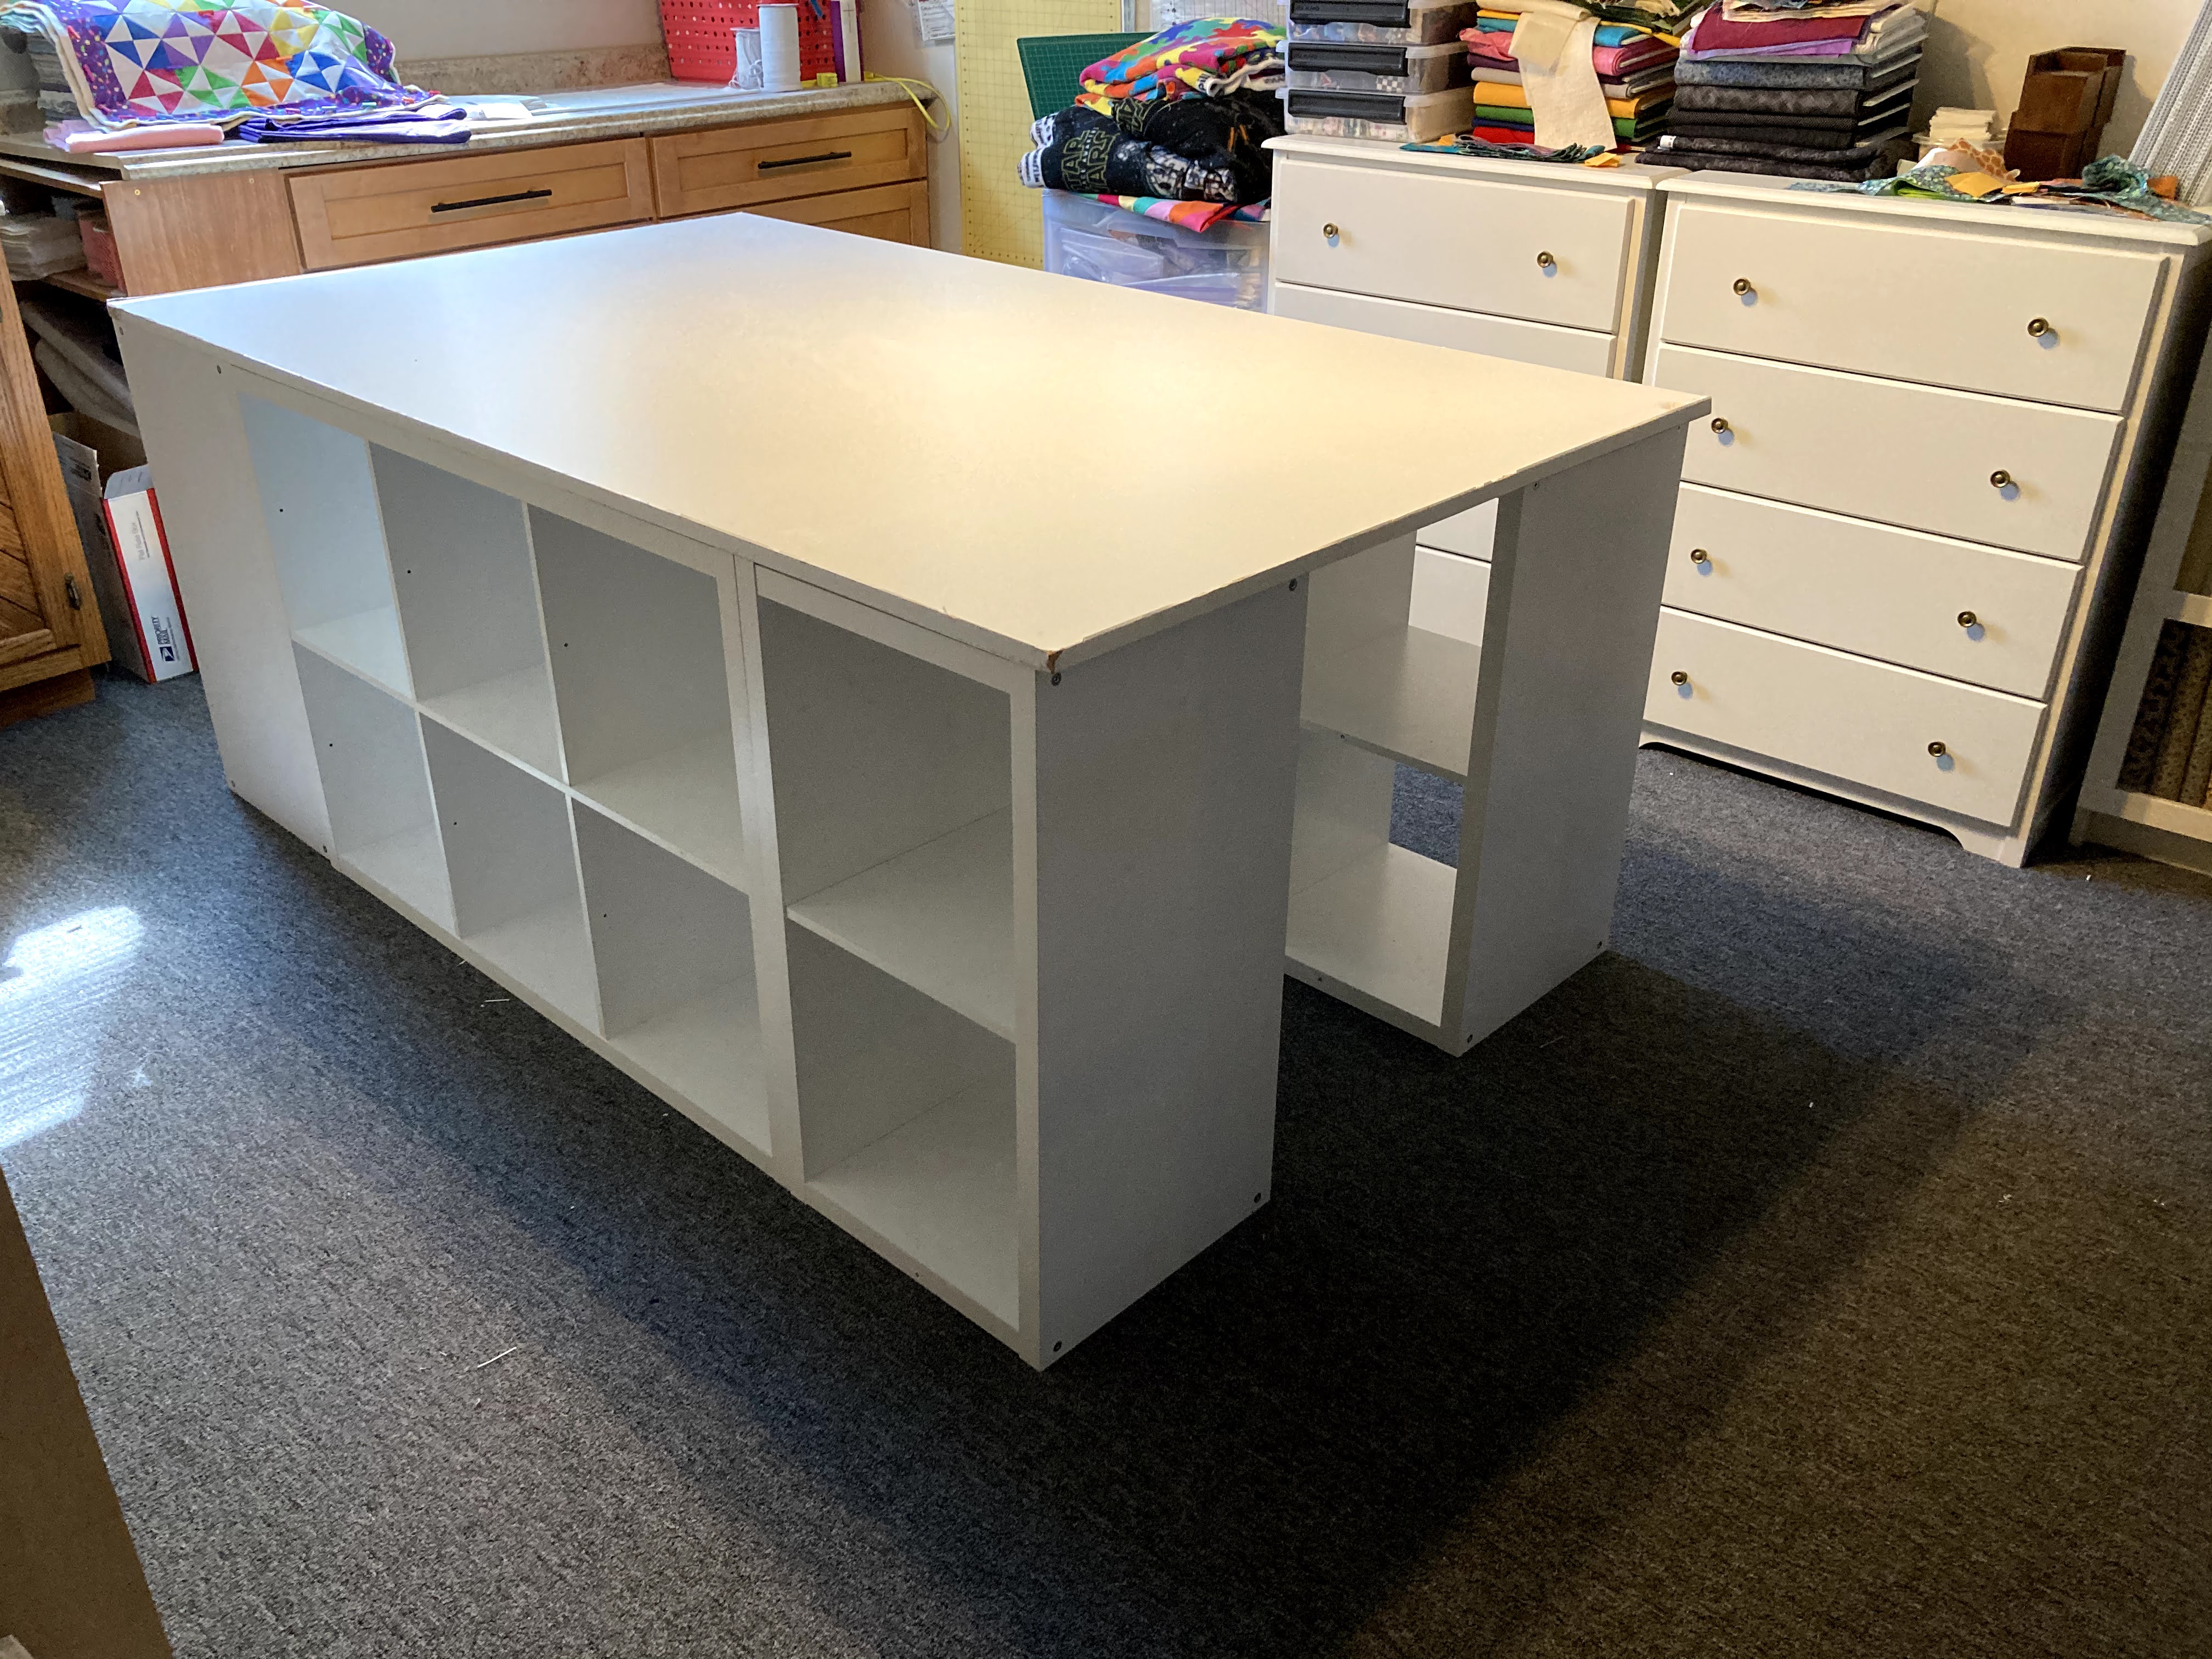
The cube shelves are now in the fabric room, waiting for DH to have the time and motivation to make my new cutting island. I already emptied a different set of shelves from the fabric room, and those shelves were moved to the new shed. Not much goes to waste around here, it just gets moved around for new purposes, though I have been known to purge a bunch too. 

Speaking of purging, I had to re-buy something I purged years ago. Ice cube trays. Our ice maker in the freezer broke, and I needed to buy ice cube trays. I've never had any luck with getting an ice maker repaired, so I wasn't thinking it was worth having a repairman out for that. 

I am calling a repairman tomorrow though, because the air conditioner in our addition went out, and it's still 100 degrees during the day here. The unit is only four years old, so I'm pretty put off that it isn't working. I'm hoping it just needs to be recharged or something. Thankfully, it's getting pretty cool at night, so if I can get a repairman out tomorrow, it might not be too bad. The unit for the rest of the house is functioning, thankfully, but our bedroom is in the addition. I noticed it getting hotter and hotter while I was sewing in the bedroom today, and when I checked the thermostat, I was bummed. 

I haven't finished anything sewing-wise in the last week. I have 50 of 80 blocks done for another quillow, and I have the strips sewn into pairs for the last of those blocks. I sewed all of my blue 1.5" strips into pairs, and I'm hoping to get at least two quillows out of those, When working with narrow strips like that, I always press the pairs of strips flat before sewing pairs together. I'll be going for six strip stripsets, so after I spend tomorrow pressing the huge pile of pairs, I will be able to sew the pairs into three (thus six strips) before pressing again. Sub-cutting the stripsets won't take that long. Neither will the rest of the sewing. Pressing a big pile of strip pairs, THAT will take a while, and you better believe I won't be pressing in my bedroom with no air conditioning. I guess I'll give my new ironing station a try, even though it means I'll have to keep carrying stuff up and down the stairs. 

One of the quillows I'm making was requested to be white, which surprised me. It's for a child so I didn't think white was the best option. I made a few blocks of a couple different options, and when given a sneak peek, the parents changed their minds. 

The thing is, when faced with a choice of "white", I had pulled all the narrow strips I had with a white background, that had colors on it.


At first I found the blocks pretty boring, but when I started making more I actually really started to like them. After years of quilting and figuring out my own quilt preferences, I've decided I am not a "low volume" kind of girl, especially in narrow strips like these. When only an inch of fabric is showing, and there's a lot of color on there, you don't really know how it will read in such a small area. Occasionally I like a busier background, but most of the time I prefer a blender, tone on tone or a solid for a background. Low volume may be big in the quilting world right now, but I'm OK with not being on that bandwagon. The thing is, I'm liking these fabrics with each other, just not as a background for a block. So, even though the white quillow wasn't on the docket anymore, I'm still making one, and I've already figured out who will get it.  I need to make about 60 more "white" blocks.

It's funny, I had already realized I wasn't really using the busy white fabrics from stash, so I started using them for backings. I'll still have scraps from those fabrics for quite a while, even if I never buy another fabric like that, so I'm glad I found something I like them in. I don't mind busier backgrounds as much if the pieces are bigger, like 3 inches, or even two inches if it's paired with the right thing. Fat quarter bundles always have busy neutrals, so I think I'll always have some in stash. 

Last year I was asked a bunch of times how I could stand making the same pattern over and over again. Honestly, rail fence blocks are about as easy and boring as you can get. I don't really get tired of making them though, for a couple of reasons. The biggest reason is since this a scrap busting project, it's an easy, fast way to use a bunch of scraps, and  I'm literally dealing with hundreds of different fabrics, so there's a lot to look at. I made the quillows with car use in mind, and I don't need to make heirloom quilts to use in a car. They'll get stepped on, spilled on, drooled on, maybe even vomited on if someone gets motion sick. It mostly just needs to hold together and be easily washable. It's a great use of scraps in a simple pattern. One of my kids prefers strip quilts as opposed to all others. No stars or triangles for her, it's all about rectangles. So although I am certainly capable of making something much more complex, not every quilt needs that, nor does every recipient want that. 

I though I was making four more quillows, but my list has grown to seven. One of the things about having a large family, I always know someone who wants a quilt!


Thursday, October 1, 2020

One Memory Quilt Down


I finished the memory quilt for my BIL from my late sister's clothes. I'm pretty happy with how it turned out. I started on the rag memory quilts for my niece and nephew, but the way things are working around here, I only really have time to work on them on the weekends. I need extra cabinet space to realign the rag blocks, so the best machine to sew those on is my Bernina, which is in a large cabinet in the basement. 

Weekdays I have been supervising a couple of my grandkids doing distance learning, and I'm sure these two aren't the only ones who need gentle reminders throughout the day to stay on task. They are doing school in the living room, so my living room sewing area is currently a school computer station. 

I've tried doing some sewing downstairs during school, but it just wasn't working well. I decided to bring a sewing machine up to my bedroom which is very close to the living room. 


This is my bedroom setup. I brought up the rolling cart that has cut several projects on it, and I've also brought up the strips I needed to piece the four quillows I need to make for this Christmas. This setup is working great for that. It's at a 90 degree angle from my desk with my computer, so I can use the same chair for both areas easily enough. 

Since I can stop whenever necessary to go check on the kids in the next room, this is allowing me to actually get some things sewn during the week, which I desperately needed. 


I got all the blocks done for 2 quillows this week, sewing just during school hours! I'm determined to only use scraps for the quillows, continuing my scrap busting spree that I started last year. One quillow was requested in teal, and honestly, I just don't have a lot of teal in stash. I have NO yardage of teal, and only a few fat quarters. I didn't want to cut into any fat quarters, it all about scrap reduction. I expanded on that idea and included aquas, and any fabric I had that had blue and green or any bluish green or greenish blue. I couldn't find any teal fleece for the backing either, so I guess green will have to do. The second stack is for a purple quillow, and I sewed up every purple 2.5" strip I had in the scrap user system. Some of the fabrics in that stack are white backgrounds with a lot of purple on them. I love purple, (wearing purple from head to toe today, in fact)   but I can never keep purple fabric in stash. The only colors I have less of are orange and yellow. I think I must always use purple fabrics as soon as I get them, so my stash of purple never really increases.         

The next two quillows I'll be making blocks for will use 1.5" strips. I started sewing one of those today. Smaller strips means more sewing, so I expect the next two to take longer to get the blocks done. 

I'm still working on reorganizing the house, and the next couple projects will be in my quilting areas. I've designed a new cutting table made out of cube storage units. I'll be using the two units I already have, and adding another couple. Today my casters came, and my last cube unit is due to arrive today. I am super excited about the new cutting island, because along with lots of cubes for storage, I've designed it to be able to store two rolls of batting!!! Rolls of batting are the most cost effective way for me to buy it, but they are always in my way. I'm am anxious for them to have an actual home! With the island on casters, I will be able to move it to the side if we need room for an air mattress for company. I need DH to do most of the cutting island assembly, and he has to get his scooter magazine out within the next two weeks, so I'll have to wait a bit, but I'll be sure to post pics of the process of building it. 

Since the cube units will be leaving the sewing room, and relocating to the fabric room, I'll have enough space in the sewing room for a permanent ironing station. I've got that in the works too, and I should be able to build it myself. 

Once both of those new things are built, I'll be rearranging the closet in my sewing room, taking a lot of what is in there out where it will be easier to access. I plan to re-home  two sets of shelves I'm currently using, since I'll be gaining new storage. My goal is to get my storage down to some very functional key pieces, and ditch the stuff I've been using that really wasn't working well. 

Emptying the coat closet in the living room is on my October list as well. I'll likely do it when the grandkids have fall break from school, so I can work on it on weekdays. Anyone have any great ideas for motorcycle helmet storage??? All of DH's riding gear is in that closet!